
How To Attach A Clasp To A Fishing Line Before Stringing Your Beads.

   Nothing is impossible for you if you believe. You can either attach your clasp before stringing your beads or when you are done with your designs. Whichever way, you are good to go.

Here, in this post i will be showing you how to attach your clasp before you begin your beads.
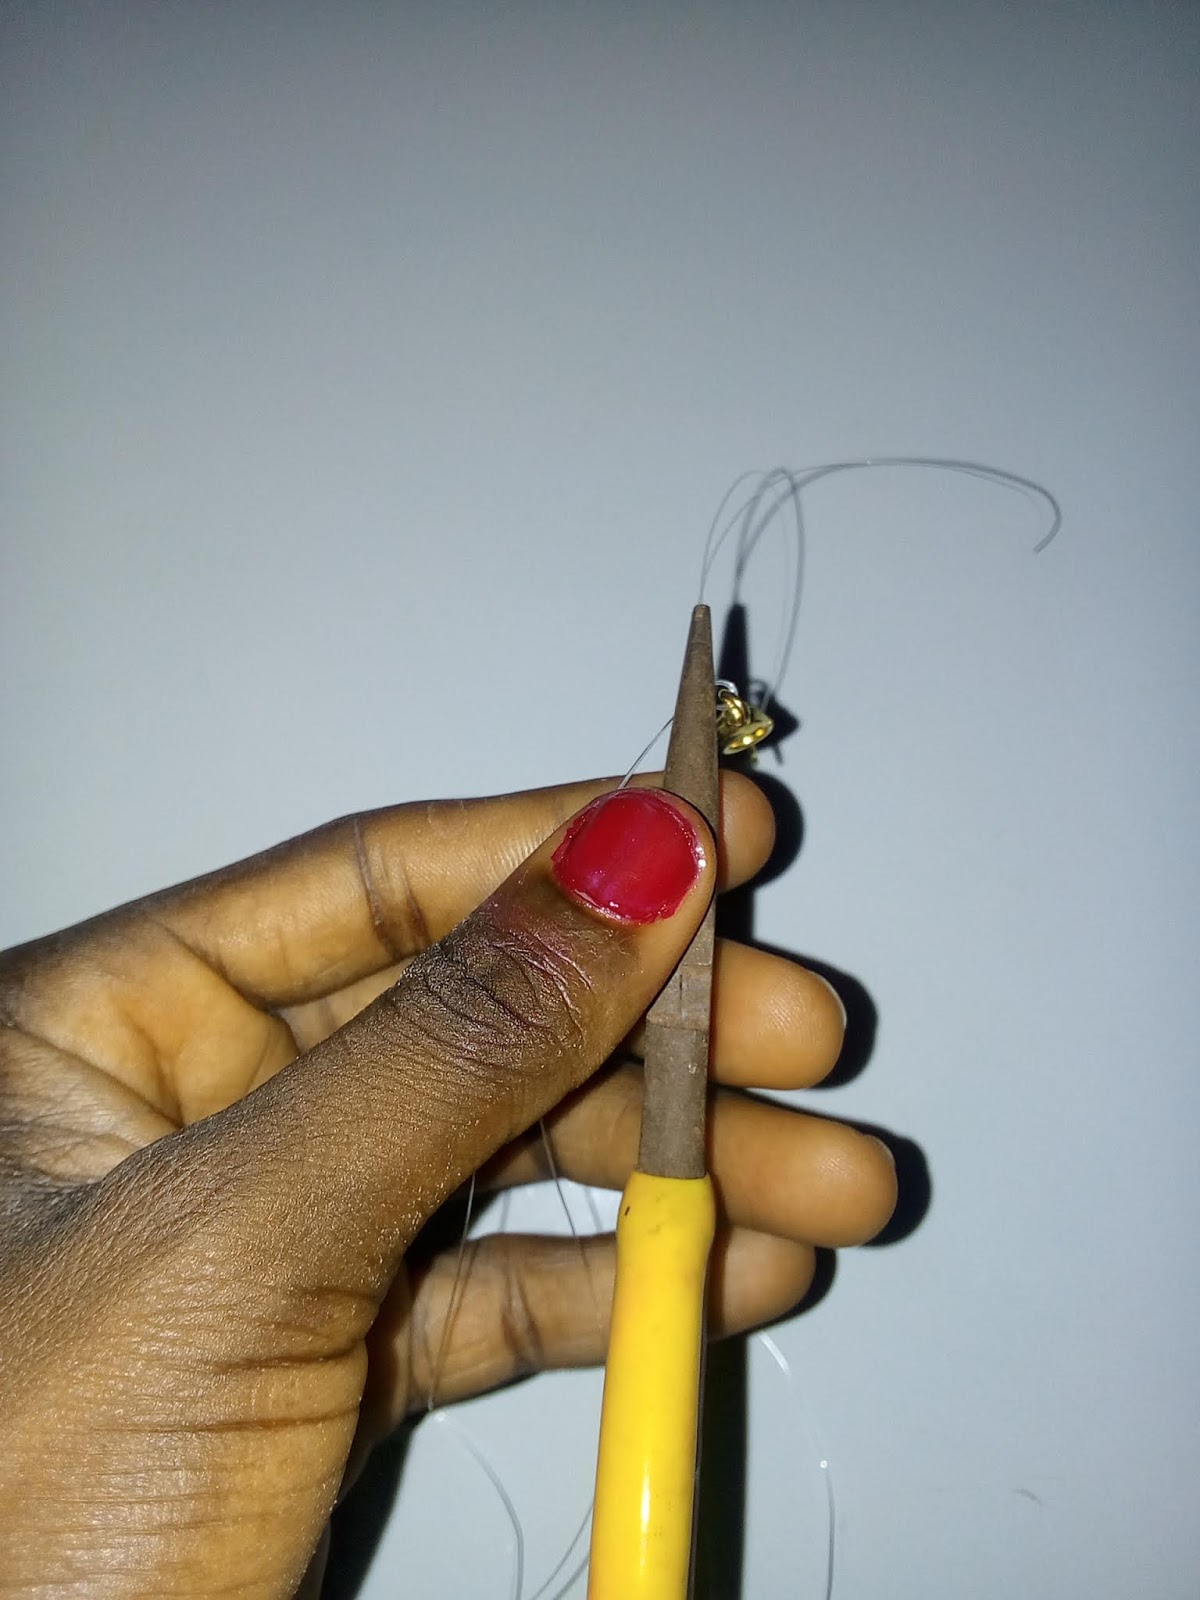
         There is an important tool in bead making that is needed here, it is used to crimp or flatten the stopper. The tool is called the ' flat nose plier'. Two important tools are needed here to attach your clasp and they are a crimp bead or bead stopper (any one will work for it)  but for this post, i will  be using a bead stopper and the flat nose plier.

Instructions

Cut your desired length of fishing line and double it.


 String a bead stopper and attach the clasp onto the same  end of the line.


Thread the fishing line back through the  stopper.


NOTE: Make sure you leave some spaces between the stopper and the clasp so as to move freely.

Get your flat nose plier and use it to flatten the stopper. 


Get your materials for your design and string your beads.

Don't forget to do the same for the other end of the line immediately you finish stringing your beads and coming out with your expected design.


Having done that, you have successfully attached your clasp to your necklace. 
Happy Making!

Comments

Popular posts from this blog

How To Make A Beaded Necklace With Fishing Line

 As humans, we cannot do without the help of others, we need people in life that will support, assist us. Everyone needs someone to get things done at  every point in life. We need each other to survive that's the reason in bead making, every tool is important because without one, the other won't be able to stand alone.         In this context, fishing line is as important as every other tool while beading because, with this tool, you are able to string your beads to make any design you desire. Fishing line can be used when making necklaces, earrings and bracelets to create any design you can think of. It is in different sizes  of 0. 25mm, 0.30mm, 0.35mm, 0.45mm, 0.50mm there is also a stretchy fishing line of 0.5mm, 0.8mm and 1.0mm that you can use in making  a necklace or bracelet that will be easier to wear without attaching your clasp or hook.    Beading generally means stringing your beads onto a line, that 'line' is c...

Beginners Guide To Making A Spiral Bead Design

       Spiral bead design is a popular type of design that both beginners and experts always make lovely design from it. The size and type of bead that is being used here should be taken into consideration, that is due to the style of the bead. You can make a single spiral or even double or many layers with spiral design its all depends on how creative you are and how you can combine colours while working with beads.     Here, in this post, I will be giving you the procedures of making two designs, but it's not limited to these. Make sure you follow the steps one after the other. You may encounter some  mistakes, its normal, just be focus and try to improve.  How To Make Spiral Two Design With Crystal And Seed bead.    These are the procedures to follow to make this design. Materials include:  1. Seed bead (Size 3) 2. Beading Thread(0.25mm or 0.30mm) 3. Beading Needle 4. Crystal Bead 6mm (size 6) or any other be...